How to Import Your CRM Data Using the Self-Import Tool
ClientLook commercial real estate software allows you to import up to 1,000 contacts or properties at a time using the self-import tool. Once your file is prepped you will import your data utilizing our self-import tool wizard defined in the steps below.
NOTE: If you want to import a file containing more than 1,000 records then simply send it to support@clientlook.com for processing.
Most applications (like Outlook, Excel, Gmail, etc.) will allow you to export or save your data in a Comma Separated Values or CSV format. The self-import tool requires your file be in .CSV file.
- Save your file as a ‘CSV’ file
- Press ‘File’
- Press ‘Save As’
- Choose ‘CSV (Comma delimited)(*.csv)’
- Press ‘Save’
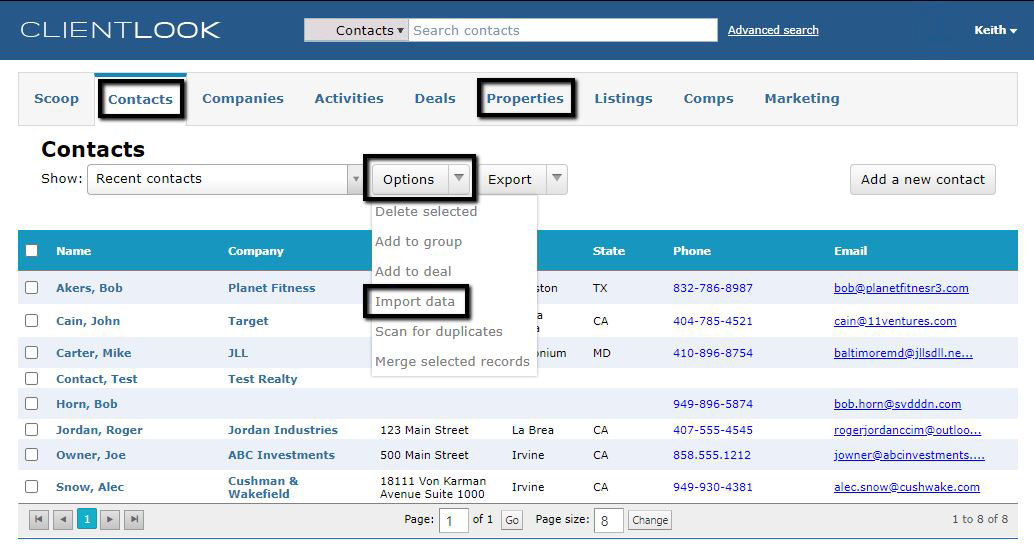
- Press the ‘Contacts’ or ‘Properties’ link on the main menu depending on the type of data you are importing
- Press ‘Options’
- Press ‘Import Data’ (Step 1: Choose your input file of the wizard)
-
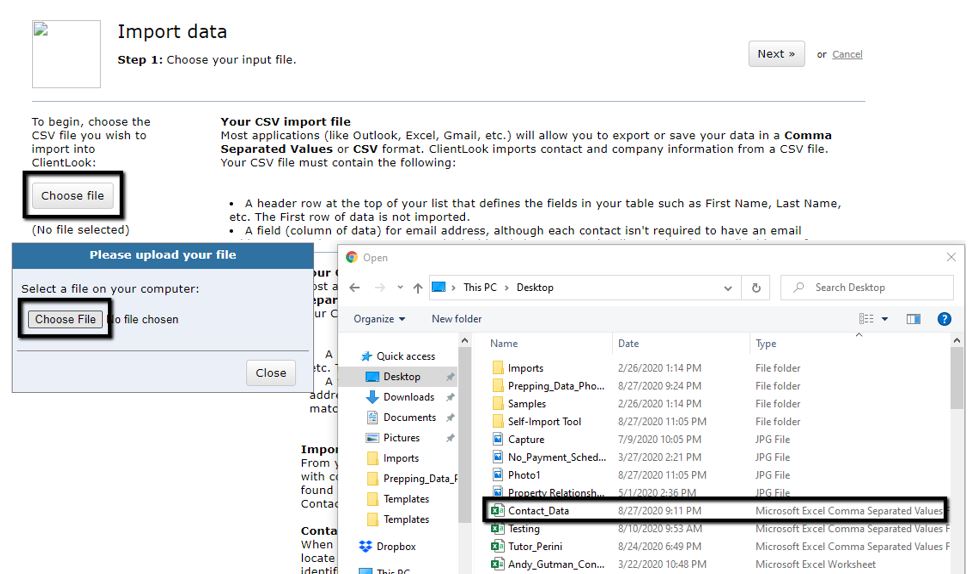
- Press ‘Choose file’
- In the ‘Please upload your file’ box, Press ‘Choose file’ again
- Search your hard drive or network to find your file and press ‘Open’
- Press ‘Next’
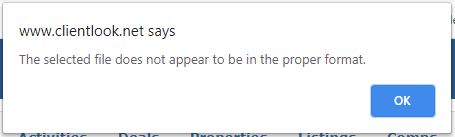
If you skipped Step 1 the system will return a message letting you know your file does not appear to be in the proper format
5. Import data (Step 2: Select import process of the wizard)
-
- Select the ‘Manual Process’ radio button when prompted to ‘Select an option’
- Press ‘Next’
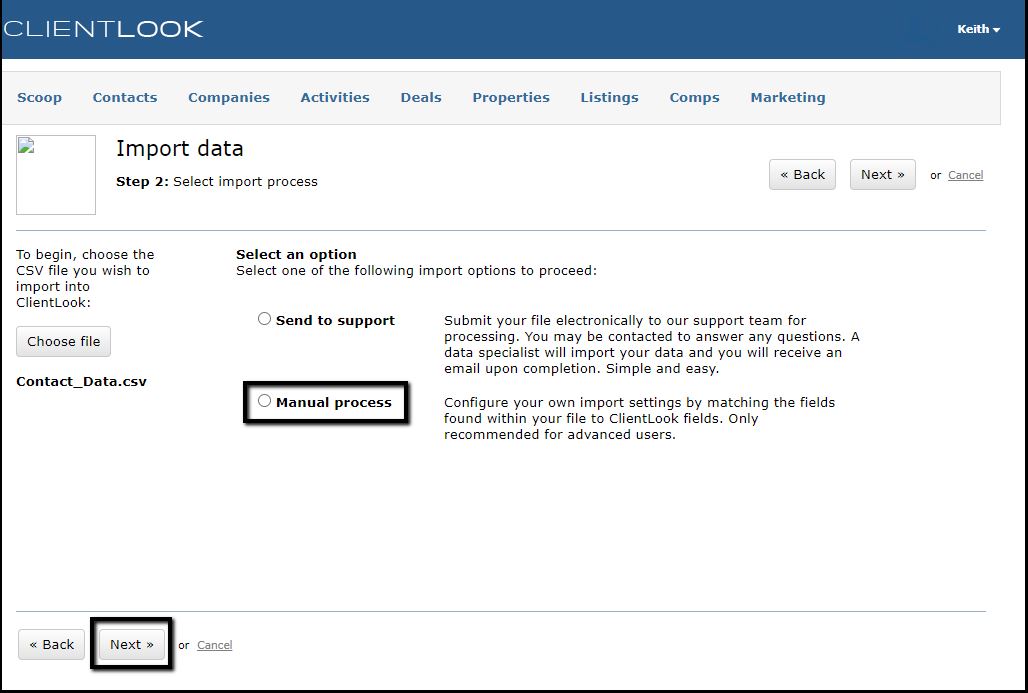
At this point if you decide you would prefer our team to import your file choose the ‘Send to support’ option. In addition, if your file has over 1,000 rows you will not be given the ‘Manual Process’ option.
6. Matching Contact Fields (Step 3: Match the ClientLook contact fields below with the correct data from your import. Empty fields will not be imported of the wizard). The bold field name on the left is the ClientLook field, the pulldown are all the columns headers on the file you uploaded.
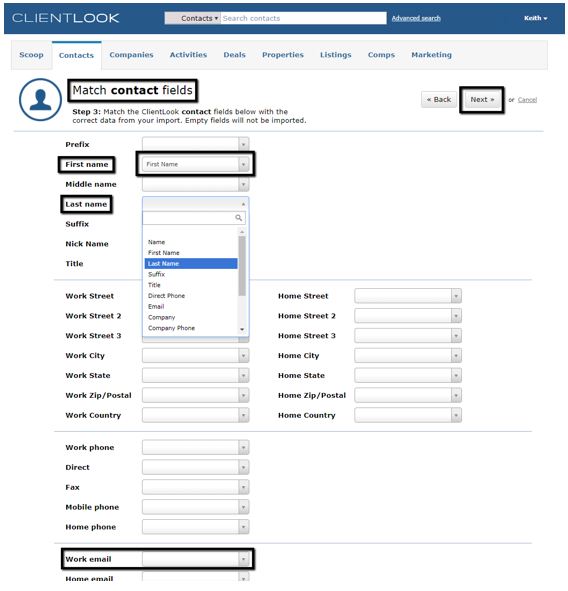
-
- For each ClientLook field name use the pulldown and choose the column on your file you want imported into the contact record
- Press ‘Next’
- For each ClientLook field name use the pulldown and choose the column on your file you want imported into the company records
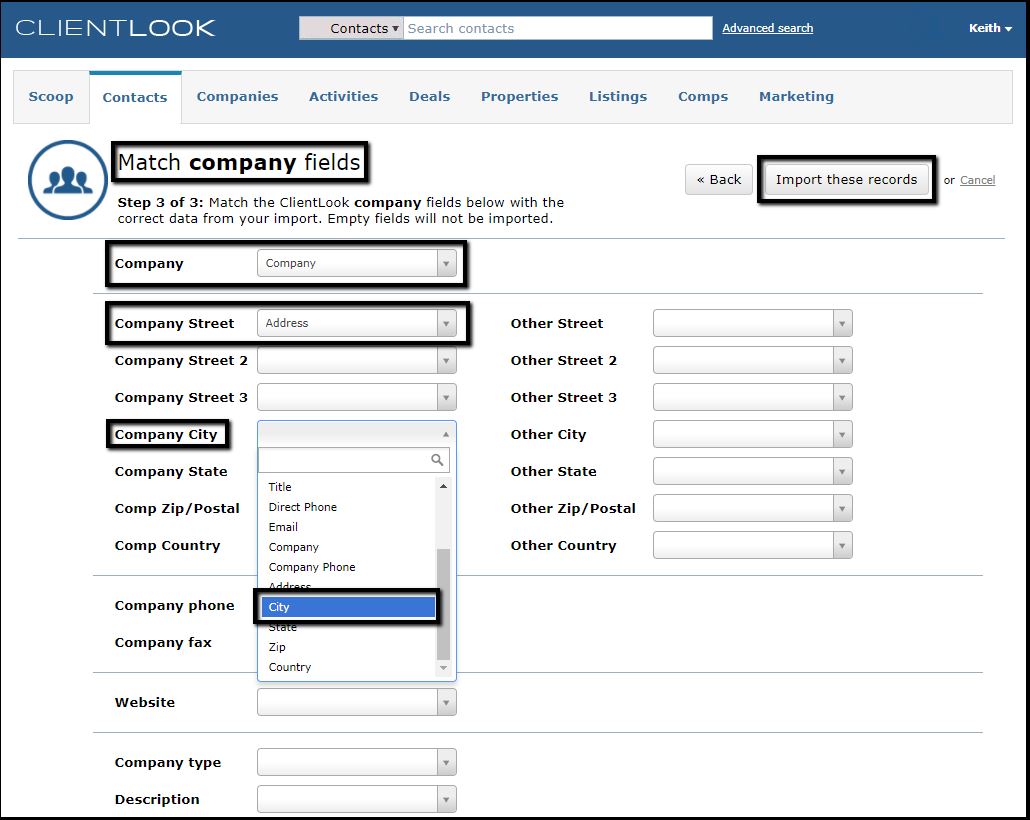
You do not need to map each of the ClientLook fields just the columns on your file you want imported.
Miscellaneous Notes:
- You are required to map the ‘First Name’, ‘Last Name’ and ‘’Work Email’ fields
- Each contact is NOT required to have an email address, but you must map the field, even if the emails are all empty.
- Each contact is required to have a ‘First Name’ or ‘Last Name’
- If your ClientLook database has an existing contact with the same email address, the incoming contact is skipped.
- Contacts with no email address are always added.
- Contact and Company fields are mapped on separate pages
Related posts