

Success with email marketing is critical for any commercial real estate sales professional, however it’s often difficult to integrate with CRM. You end up spending lots of time and effort trying to make everything work together.
LightBox ClientLook’s CRM software for commercial real estate offers an integration with Mailchimp. This integration makes it easy to manage distribution lists, send emails and identify prospects. It provides everything you need to maximize your marketing effectiveness and accelerate deal making.
This article will help you understand how to:
- Connect Mailchimp to ClientLook
- Sync groups from ClientLook to Mailchimp
- Send campaigns in Mailchimp using ClientLook list data
- Identify top prospects based on real-time engagement statistics
How To Connect to Mailchimp
To setup the new integration, you need to connect Mailchimp to ClientLook. Only an Admin level user in ClientLook can set up the integration. Once connected, it’s available for all account subscribers to use. Only one Mailchimp account may be related to a respective ClientLook account at any one time. Follow these simple steps to connect Mailchimp to your ClientLook account.
From any page in ClientLook:
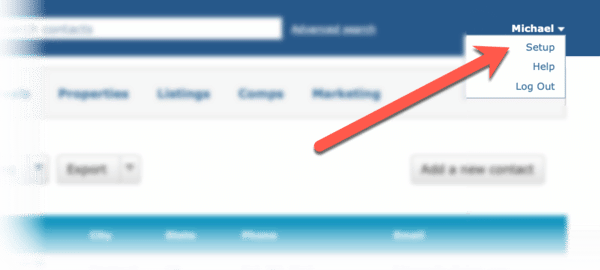
- Click your name (ie. Michael in my case) in the upper right corner of the page.
- Choose the Setup option from the list.
The Setup module for your account appears. Do the following:
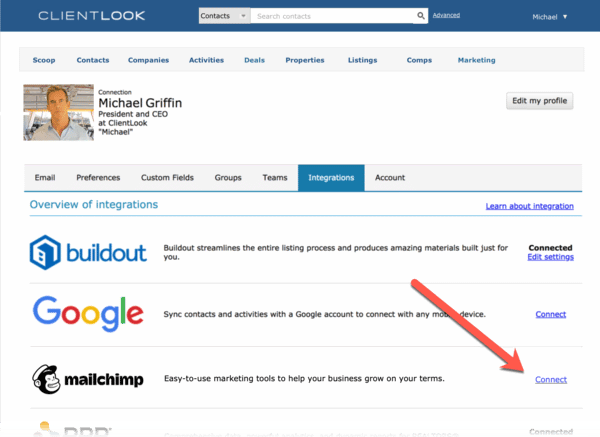
- Navigate to the Integrations tab.
- Find the Mailchimp section in the list of integrations.
- Click the Connect link as shown below. This should expand the Mailchimp section. If no Connect link appears then contact your account Admin for help.
In the Mailchimp section within the Integrations tab:
- Click the Connect to Mailchimp button that appears when the section expands.

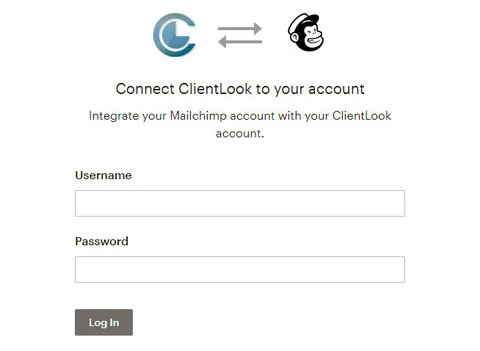
A Mailchimp pop-up will appear:
- Enter your Mailchimp account credentials when prompted.
- Allow whatever permissions may be required by Mailchimp to authorize the integration.
- Once your Mailchimp account has been verified, then you will be returned to ClientLook.
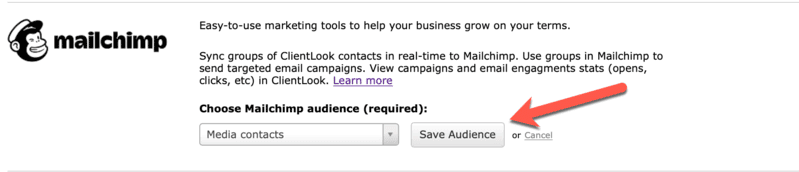
Choose an Audience within the Mailchimp section:
ClientLook can sync to one (1) Audience, which is another name for an email list in Mailchimp. Since you may have more than one Audience in Mailchimp, you need to tell ClientLook which one to use.
- Choose your desired Audience from the list that appears.
- Click Save audience to confirm your choice.
Congratulations – Mailchimp is now Connected to ClientLook as shown below! You’re ready to setup your groups.
Choose ClientLook Groups to Sync
The integration syncs people related to specified ClientLook contact groups to your Mailchimp account. You need to tell ClientLook which groups should be a “Mailchimp group”. You can choose as many as desired. No groups sync by default, so this step is necessary for the sync to work. Here are some important details related to group syncing:
In Mailchimp, a ClientLook group is represented as a “Tag” using the same name.
- Adding one or more contacts to a Mailchimp group in ClientLook causes those records to sync to Mailchimp. Those contacts get labeled with a Tag for the ClientLook group.
- Removing one or more contacts from a Mailchimp group will cause the corresponding Mailchimp Tag to be removed from that contact’s record in Mailchimp.
- A contact in ClientLook may belong to multiple Mailchimp groups.
- A contact in Mailchimp may contain multiple Tags.
- ClientLook never deletes contacts from Mailchimp even if a contact is removed from all Mailchimp groups.
- ClientLook pushes data to MailChimp, but does not pull any data from Mailchimp. The data transfer is one-way.
Mailchimp is now connected to ClientLook, and you understand how groups work to sync data. The next step is to choose which ClientLook groups you want to sync to Mailchimp. Fortunately, that’s easy.
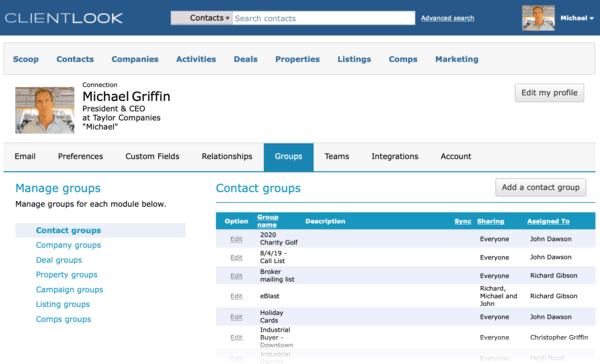
In the ClientLook Setup module:
- Go to the Groups tab.
- Choose Contact Groups from the list on the left
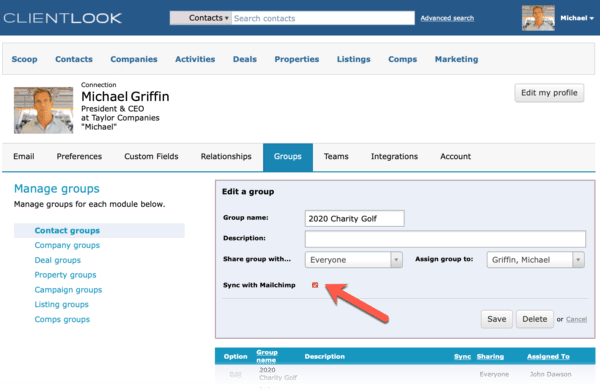
Edit a group to trigger sync:
- Find a group in the list and click Edit.
- The Edit a group popup will appear.
- Check the box marked Sync with Mailchimp to indicate that this group and its members should be synced.
- Click Save to save the changes.
Important note to keep in mind:
If a Mailchimp group is edited and you uncheck the Sync with Mailchimp option, then the corresponding Tag will be removed all related contacts in Mailchimp upon saving.
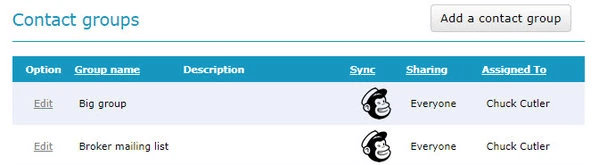
Once the group has been synced, you’ll see the Mailchimp logo appear in the “Sync” column for that group when you come back to the Contact Groups section of the Setup module.
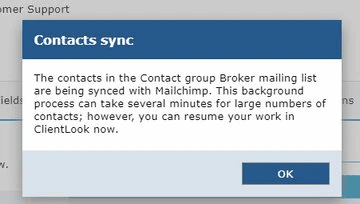
When you sync a ClientLook group to Mailchimp for the first time, you may see a message indicating that your group will be synced in the background. For larger groups, this can take a few minutes to complete. Don’t worry, you can continue working in ClientLook while this is happening.
Send Emails from Mailchimp Using Tags
Now that your ClientLook groups are syncing, you’re able to send campaigns that are far more targeted in Mailchimp. Remember that ClientLook groups are represented in Mailchimp as “Tags”. Both will have the same name. You’ll use these Tags in your email campaigns.
One great thing is that you don’t have to change the way you use Mailchimp. Simply create a template as always, then create your campaign. The key is to use one or more Mailchimp Tags as recipients within your campaigns. Mailchimp offers great documentation on creating email campaigns using Tags. Click here for instructions on how to send Mailchimp campaigns using tags.
Tracking Campaigns in ClientLook
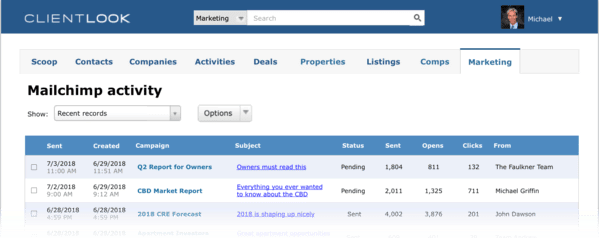
The campaigns sent from your Mailchimp account will automatically be displayed in ClientLook in the Marketing module. Every time you open the Marketing module, the list of campaigns is refreshed. This includes the statistics related to each campaign.
How to view the list of campaigns:
- Click Marketing from the navigation menu in ClientLook. This may take a few moments as all of your campaigns are refreshed from Mailchimp.
Tip: Click the Subject of any campaign to see a sample of the actual email template.
How to view details for a specific campaign:
- Click the name of any campaign in the list. This may take a few moments to load as real-time data is being compiled from Mailchimp.
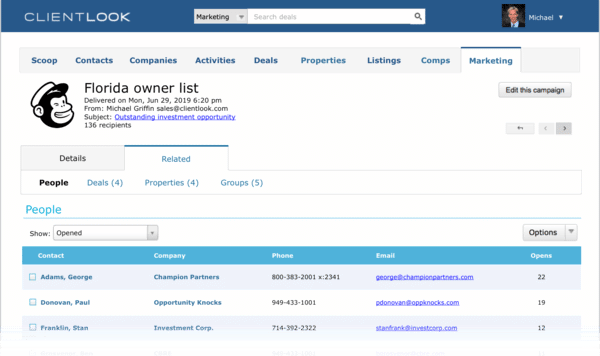
- Click the Related tab to see an overview of recipients categorized by clicks, opens, etc. Also see related Deals, Properties and Groups.
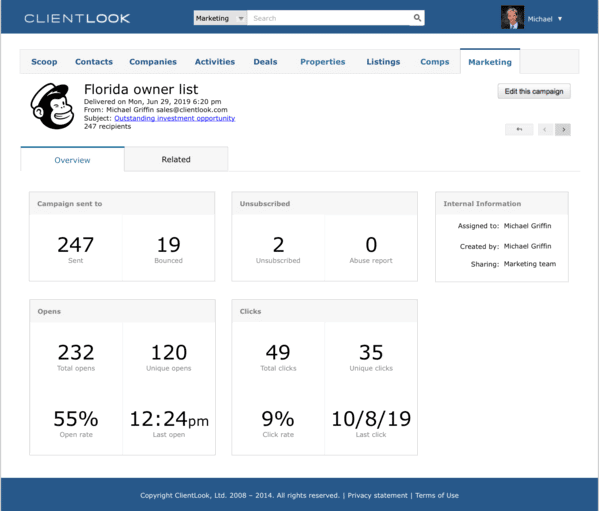
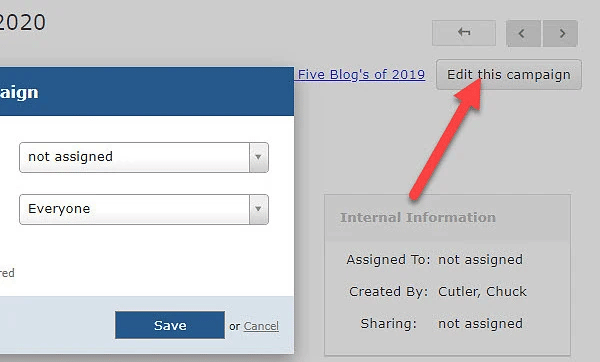
How to change campaign privacy:
By default, all campaigns are shared with everyone in your ClientLook account. This can be modified by changing the Sharing and Assign to values of any campaign.
- Click the Edit this campaign button in the campaign detail page.
- Edit the values in the popup that appears. All entries are required.
Viewing Campaign Stats for a Contact
All email activity generated by Mailchimp campaigns appears in your contact’s record, displayed in real-time directly from Mailchimp. This gives you incredible insight into a contact’s interest level with the emails you’ve sent them. Use this intelligence to make the most out of every interaction.
How to view a contact’s email engagement:
- Go to the contact record of a person who has been sent an email in Mailchimp.
- Click on the Related tab and choose Marketing. This causes the real-time engagement statistics for this contact to load.

If you’re not a current ClientLook subscriber, schedule a demo today to see how our CRM software can help you with your email marketing efforts.
Already a ClientLook subscriber? Request a free Success Audit to make sure you’re getting the most out of all our features.